Sword Art Online Hollow Realization Deluxe Edition Pc Switch to Controller
Tabular array of Contents
- Introduction
- Controls
- Controls for nintendo switch
- Controls for playstation
- Tutorials
- Relieve
- Battle
- Skills
- Navigation
- Inn room
- Inventory / vendors
- Treasure chests
- Money
- Equipment / blacksmith
- Party / friends
- Quests
- Events
- Dominate
- Multiplayer
- Sacrament invasion / dungeons
- Change appearance
- Changes to game mechanics
- History of SAO
- History of ALO
- Characters
- Town of Beginnings
- Map
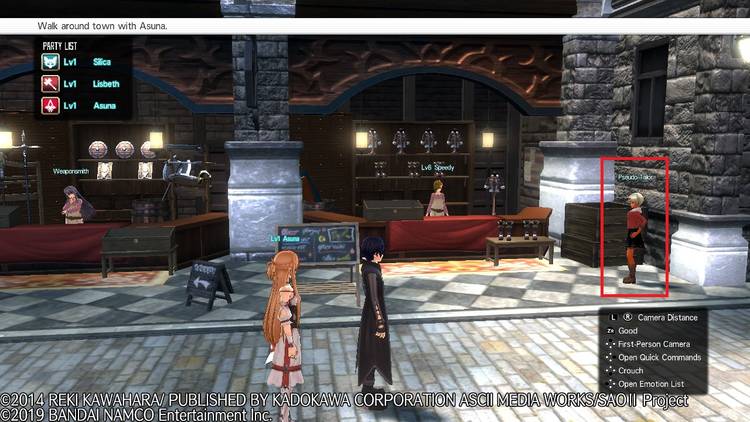
- Walk effectually with Asuna
- Rustoria Plains
- Explore outside town
- Gather materials for Lisbeth
- Start Premiere's quest
- Remove the roadblocks
- Explore the castle
- Rustoria Plains region dominate
- Rustoria Plains complete map
- Oldrobe Forest
- Explore the forest
- Stop the ceremony
- Continue Premiere's quest
- Stop the poison rain
- Explore the grotto
- Oldrobe Forest region boss
- Keep Premiere'south quest over again
- Oldrobe Woods complete map
- Jeweled Peaks Lakes
- Explore the lake
- Actuate the teleporter
- Explore the fastille
- Search for another path
- Explore the fastille further
- Jeweled Peaks Lakes region dominate
- Jeweled Peaks Lakes complete map
- Kurjiez Desert
- Explore the desert
- Detect the console
- Continue Premiere'due south quest further
- Become through the tornado
- Explore the tower
- Kurjiez Desert region boss
- Find a picnic spot
- Kurjiez Desert complete map
- Oltrum Bastion
- Explore the fortress
- Explore the temple
- Oltrum Breastwork boss
- Keep the story
- Oltrum Bastion complete map
- Aincrad
- Explore the mysterious surface area
- Aincrad dominate
- Aincrad consummate map
- After the principal story
Tutorials
Open the main menu and select tutorial whenever you want to read over these entries again.
Note on the text color :
The tutorials of the game are described below in text color gray.
The information that I added is written in text colour black.
Relieve
The game saves automatically. The game is saved every time the loading screen appears.
Battle
Staggering enemies
Press the Y (switch) or □ (playstation) button in one case to slash.
Press information technology repeatedly to activate a sword skill and perform a philharmonic.
Press the X (switch) or ∆ (playstation) button to activate a sword skill instantly. This consumes SP, but increases the assault's power.
If yous fourth dimension your sword skill to strike right after an enemy'southward skill, y'all can stagger the enemy. You lot can deal more harm to a staggered enemy.
Notation: In the gainsay tutorial hit the enemy at the moment it casts an area attack (ruby area) to stagger the enemy.
Combo ratios
A philharmonic ratio is displayed whenever y'all attack an enemy. This is a impairment multiplier, then higher numbers are better. The longer your combo goes unbroken, the higher the hit count volition go, which increases the damage multiplier. The damage multiplier will likewise increment when you time your slashes perfectly with the combo judge. The more constructive your attacks are the college the ratio volition climb.
Note: In the combat tutorial striking the enemy without interuption to get to a damage multiplier of ii.00.
Evading enemy attacks
When enemies set on, sometimes the area of effect (AoE) will be displayed. This gives you a chance to evade the attack. While moving the Left Stick in the desired direction, press the R push button to perform a quick step. Performing a step makes you briefly invulnerable, assuasive you to evade the incoming attack.
Note: Press the left joystick to lock the target. This makes it easier to dodge and to resume attacking.
Performing chain attacks
You can issue a variety of orders from the party command listing, simply i of the strongest is the chain control. To use a team attack press and hold 50 push and printing the sword skill button. When ordered to perform a chain attack, your ally will perform a serial of damage multiplier-raising combo attacks. Yous can heighten your philharmonic ratio by unleashing your sword skills in sync with your marry's attacks.
If your are the one to succesfully terminate the chain attack, you lot volition actuate a skill chain attack. Allies are defenseless when performing chain attacks, so stagger enemies and parry attacks to defend them.
Note: In the combat tutorial printing and agree 50 and press sword skill button to make an ally starting time the chain, wait for your other allies to continue the chain to chain 2 and chain 3 (automatically) so you can stop the concatenation with a sword skill (without the Fifty button). If succesfully, the message chain done! appears.
Party commands
Press the L push to bring up the party control menu. From here, you can assist allies or chain attack with them. You can also order your allies to heal, social club them to target an enemy or even encourage them.
Switching
Switching immediately cancels all other actions to deliver a powerful blow that causes enemies to reel. Switching allows you lot and an ally to swap places at critical moments, and is groovy for turning the tides of boxing. Unleasing a sword skill on a foe reeling from a switch activates a powerful skill concatenation attack. Skill chain attacks deal massive damage to downed enemies and they can be used to cease those enemies off for good.
Compliments
You can compliment your partner on a job well done. The name and category of your partner'south last action is displayed only below their HP approximate on the left side of the screen. Complimenting your partner helps them remember certain actions and over time that action will become their specialty.
Revive
When you die, an ally revives you automatically. When an ally dies, walk to your ally and press and concord the A (switch) or o (playstation) button to revive your ally.

Exp concatenation bonus
Felling enemies in quick succession boosts your concatenation count, which grants a chain bonus. These bonuses grow equally you go on to take down enemies, but the bigger the concatenation, the faster the bonus consequence wears off. Just don't expect to farm weak enemies to build a chain. Anything 10 or more levels beneath the party average won't count.
Principal palette
The main palette is a custom control panel. Utilize the directional buttons to move the cursor, and the A (switch) or o (playstation) button to use the skill. The main palette disables sure controls while active, so exist careful when using information technology. Open up the main card, then choose set palette to edit the principal palette.
Annotation: I prefer to use the command en sub palettes instead of the main palette. I will draw my layout beneath, however this is a personal preference. Experience costless to conform it the way you like.
I accept arranged my set palette as follows:
| Command Palette (attack) | ||
|---|---|---|
| Y / □ | Regular sword attack | |
| X / ∆ | Deadly Sins | |
| A / o | Nova Ascension | |
| B / ten | Leap | |
Note: I removed the Parry skill, considering I always Dodge instead.
| Sub palette left (heal) | ||
|---|---|---|
| ˄ | Purification Crystal | |
| < | HP Potion | |
| > | SP Potion | |
| ˅ | Heal | |
| Sub palette right (party) | ||
|---|---|---|
| Y / □ | Draw aggro! | |
| X / ∆ | Use skills! | |
| A / o | Expert! | |
| B / ten | Switch! | |
Recommended boxing tactic
As a summary of the above topics, I take adopted the following gainsay technique:
Open the fight with a normal assault.
Give tank party command: Draw aggro!.
Give one of the allies command: Use skills!
Await for your allies to build up the skill chain to chain three.
Finish the chain with a sword skill yourself.
Requite 1 of the allies command: Switch!
In summary: ![]() > tank
> tank ![]() > marry
> marry ![]() > wait to chain 3 >
> wait to chain 3 > ![]() or
or ![]() > ally
> ally ![]()
Echo the chain edifice and switching during the battle.
If y'all or any ally has low HP, give political party command: Heal! ![]() . Brand sure that you lot stand in the greenish area, so that you get healed.
. Brand sure that you lot stand in the greenish area, so that you get healed.
Note: This boxing style is very basic. Feel free to use more skills and a more advanced battle style, only I take been able to finish the game with this style and it is easy to learn.
Skills
Skill points
The more than y'all use your weapons, the more skillful you become with them. Yous will learn skill points as you reach certain thresholds of proficiency with your weapons. On rare occasions, you may also receive skill points for defeating an enemy. You need skill points in order to learn more skills.
Notation: If you want to collect some skill points in a short time, equip a blazon of weapon that you lot have not used before and fight enemies that are several levels stronger than you are.
Skill acquisition
Open the master menu and select skill to view and select skills for each weapon. Skill points are used to acquire new skills.
Note: You tin only use the skills that correspond to the equiped weapon. If you desire to utilise the skills of a unlike type of weapon, get to equipment and equip the other type of weapon.
Extra skills
Amongst these skills you lot will observe special extra skills. Extra skills are special skill copse that encompass multiple sub skills. You tin can go one extra skill at a fourth dimension.
Talk to Agro to unlock skill fusion, mastery skills and friends' mastery skills.
Skill fusion
Skill fusion quests are special missions that tin only be undertaken by a political party consisting of yous and one other character. When you want to take on a quest, team up with your partner in the city, and then use the Y (switch) or □ (playstation) button to talk to Agro. Completing a skill fusion quest unlocks a mastery skill for you and your partner.
Mastery skills
Mastery skills grant bonus buffs to a character depending on what ex skill role they've selected. Ex skills are divides into the following categories:
- Aggressor: attacker / assassin'due south blade / celestial blades / soaring slash / damned blade.
- Tank: tank / sacred cantankerous / fanged guardian
- Buffer: buffer / sentinel / illusion thorn
- Healer: healer / warmonger / rejuvenating touh
The longer a character has an ex skill role set, the greater their mastery skill buff becomes.
Friends' mastery skills
Beating a skill fusion quest with a partner volition enable them to use a mastery skill. Use the ex skill choice on the affection system screen to activate your friend'southward mastery skills.
Talk to the other characters in boondocks to find out what skill they are interested in.
| Mastery skill in which each graphic symbol is interested | ||
|---|---|---|
| Graphic symbol | Mastery skill | Mastery skill level |
| Asuna | Healer | level 3 |
| Silica | Buffer | level 3 |
| Premiere | Healer | level 3 |
| Lizbeth | Tank | level 3 |
| Leafa | Assailant | level four |
| Philia | Assaulter | level 4 |
| Sinon | Buffer | level 4 |
| Strea | Tank | level four |
| Yuuki | Buffer | level 4 |
| Rain | Buffer | level four |
| Seven | Attacker | level 4 |
| Agro | Healer | level iv |
| Agil | Tank | level not applicable |
| Klein | Attacker | level not applicative |
| Tia | Buffer | level 5 |
| Alice | Buffer | level 5 |
| Eugeo | Attacker | level 5 |
| Kizmel | Attacker | level not applicative |
Dual wield skill
The extra skill of the one-handed sword is celestial blades, the skill that lets y'all dual wield swords.
The game is non clear about how to unlock this skill, only people on forums say you tin unlock the skill by meeting 2 weather condition:
i. Unlock either star saber or 1H sword mastery skill.
2. Hit enemies with 2000 1H sword skills (skills that miss practise not count).
Note: SS mastery indicates how often you take used a skill (both hitted and missed unfortunately).
After you lot run across the weather, you get a noticifation that says: Actress skill "Celestial Blades" has been unlocked!

Note: I unlocked mine with the post-obit SS mastery points: horizontal arc 1626 points, deadly sins 632 points, nova ascension eighteen points and all the other skills 0 points. So about 12% of my skills missed... to give you an indication.
The skill celestial blades costs 15 skill points to larn. Press the B (switch) or x (playstation) button to change extra skill.

Get to your equipment and replace your shield with a sword. This changes your main skill from 1H sword to dual blades.
 >
> 
Note: If you want to modify back to 1H sword as your main skill, replace the second sword with a shield again.
Dual wield skill tree
Each extra skill starts at skill level zero and has its own skill tree.

Note: One time y'all alter your main skill from 1H sword to dual blades, you can only use skills from the extra skill tree. You lot can't employ the skills from 1H sword any more.
Overview extra skills
Each blazon of weapon has its own extra skill. The weather condition for unlocking these skills are unknown to me, only you tin can search the internet with the search term: sword art online hollow realization hidden extra skills. Unfortunately the data is sometimes contradictory and information technology is difficult to find out the truth.
I have fabricated a list of the types of weapons with corresponding extra skills.
| Extra skills | |||
|---|---|---|---|
| Type of weapon | Icon | Extra skill | Attached to skills |
| 1H Sword |  | Angelic Blades | Star Saber / 1H Sword Mastery |
| Rapier |  | Righteous Cantankerous | 1H Sword Mastery / Rapier Mastery |
| Scimitar |  | Warmonger | Accelerate / Veiled Rider |
| Dagger |  | Assassin'southward Bract | Swift Steel / Dagger Mastery |
| 1H Gild |  | Rejuvenating Bear on | Banishment / 1H Society Mastery |
| Katana |  | Soaring Slash | Combo Freak / Katana Mastery |
| 2H Sword |  | Fanged Guardian | Dauntless Soul / 2H Sword Mastery |
| 2H Axe |  | Bract of the Damned | 2H Sword Mastery / Lightning Opinion |
| Spear |  | Thorn of Illusions | Killing Accident / Spear Mastery |
Navigation
Map screen
Press A (switch) or o (playstation) push button in front of a teleportation gate in the Town of Beginnings to bring upward the world map and select your destination. The number of destinations you can choose from is limited at get-go, but it will grow as you lot progress through the game.

Teleportation stones
Y'all can utilise the teleportation gate to travel to places directly past finding the teleportation stone in the area. When exploring a new area, your starting time objective should always be finding and activating the teleportation stone. Be advised, however, that not every expanse has a teleportation stone.
Find the main story quest destination
Select the world map at the teleportation gate. Here you can see in which of the available areas your quest is.

Select the area and a map of this surface area appears. Select the teleportation stone where the quest marker is located.

Now you volition travel to the selected area. Look at your minimap to find your exact quest location.
Note: The default minimap is a simple map. Go to the main menu, select options and fix the minimap to detailed map to get a more detailed minimap.

Inn room
You accept a room at the inn located in the Market place Street. The room is on the second floor of the inn. Hither, you lot can change your avatar's appearance, or take a nap on the bed. The teleporter in your room allows you lot admission to multiplayer/duel practise, and lets you edit your preset palettes.
At your inn room you can interact with the following furniture:
- Door: enter or exit your room.
- Bed: rest until daytime or night.
- Desk: edit avatar.
- Stone with runes: access multiplayer, duel practice, preset palette settings, beginning ssc practice and warehouse.
- Chest: access storage.
Inventory / vendors
Bag
The game does not explain anything nigh your inventory. A fleck afterwards in the game, this becomes a problem. Your bag tin can but conduct 100 items. This seems much, but it really is not. My advise is to shop your items in your storage.
Storage
You can acces your warehouse at the Teleport Gate Plaza. Press A (switch) or o (playstation) push in front of a teleportation gate in the Town of Ancestry. This opens a menu where y'all can select warehouse. Select an item to send it to your storage. Your storage tin hold 1000 items.
Note: If you demand an item for a quest or for the weaponsmith you don't have to accept it out of your storage first. You can direct become it from your storage when you turn in the quest of when you talk to your weaponsmith.
You lot can also go to your storage in your room at the inn. At that place is a breast in your room, which grands you admission to your storage.
Vendors
The vendors are located in Marketplace Street.
| Available shops | |||
|---|---|---|---|
| Type of shop | Image | Name shopkeeper | Bachelor goods |
| Weapon shop |  | Weaponsmith | Swords, rapiers, scimitars, daggers, clubs, katanas, twohand swords, axes and spears |
| Armor store |  | Speedy | Shields, head gear, armor and greaves |
| Item shop |  | Cheaps | Potions and crystals |
| Blacksmith | | Goh / Lisbeth | Does non sell items |


The vendors are also located in Teleport Gate Plaza.
| Bachelor shops | |||
|---|---|---|---|
| Type of shop | Image | Name shopkeeper | Bachelor goods |
| Weapon shop |  | Weaponsmith | Swords, rapiers, scimitars, daggers, clubs, katanas, twohand swords, axes and spears |
| Armor shop |  | Armorsmith | Shields, caput gear, armor and greaves |
| Detail shop |  | Detail shop clerk | Potions and crystals |
| Accessory shop |  | Accessory shop clerk | Neck, finger, waist, wrist and charm accessories |
And the vendors are located in Inn Lounge.
| Available shops | ||
|---|---|---|
| Type of store | Name shopkeeper | Bachelor goods |
| Weapon shop | Weaponsmith | Swords, rapiers, scimitars, daggers, clubs, katanas, twohand swords, axes and spears |
| Armor shop | Armorsmith | Shields, head gear, armor and greaves |
| Item shop | Item shop clerk | Potions and crystals |
Shady merchant
The shady merchant volition exchange sure tradable items for valuable ones. Items that you can use to merchandise with the shady merchant are listed on the special item tab.
Treasure chests
Treasure chests are scattered all over the world. Brown treasure chests can be opened once again later on re-entering the area. You lot volition also encounter blue chests, but these have been sealed shut by a powerful enemy that is nearby. Sealed chests volition refresh their contents periodically, and so you can collect from them multiple times. Items change each time. If luck is on your side, you might go a powerful particular to aid you on the journey ahead. Try opening every chest you lot find!
Annotation: In that location is an error in the tutorial, namely the chocolate-brown chest can just exist opened one time.
| Types of chests | |||
|---|---|---|---|
| Brown | Blue | Ruddy | Silvery |
 |  |  |  |
| Not guarded | Guarded by multiple enemies | Guarded by ane strong enemy | Guarded by episodic quest boss |
| Collect one time | Collect multiple times | Collect multiple times | Collect multiple times |
Money
The game does non explain anything virtually money. The currency is col.
Y'all can make coin with the following things:
- Complete side quests of the bulletin board.
- Sell equipment and items to vendors.
- Farm certain monsters that drop valuable items.
- Go on a treasure hunt in areas with many reopenable treasure chests.
Annotation: If these tips are too general for you, y'all can as well find plenty forums on the internet with specific tips on how to become col.
Equipment / blacksmith
Equipment
Open the main menu and select equipment to adjust your equipment.

Equipment color
The color indicates the rarity of the equipment.
| Equipment color | ||
|---|---|---|
| Color | Icon | Rarity |
| White | | Basic |
| Royal | | Average |
| Blue | | Rare |
| Green | | Super rare |
| Gold | | Legendary |
Blacksmith enhancing and transforming
Take whatever materials you notice to a blacksmith, and you tin can employ them to enhance or transform your weapons. Enhancing a weapon strengthens information technology and grants it a special skill that can only be applied by a blacksmith. Transformations use the materials you've gathered to create an entirely new weapon or piece of equipment. Transformations in item may likewise grant a rare skill, in improver to boosting stats. The catch is that transformations require rare materials, and those materials volition be lost if the transformation fails.
Note: If you desire Lisbeth as your blacksmith, find her in town and select appoint blacksmith from her menu. Afterward in the game she opens her own blacksmith shop, which can be found in Market Street. Talk to the female shopkeeper at the stall to telephone call Lisbeth.
Heighten
When you enhance a weapon, you upgrade the weapon and +i is added to the proper noun of the weapon. When you lot heighten the weapon more ofttimes, the counter increases to +ii, +3 and so on. You tin can boost the weapon upwards to +9. Yous will and so receive the notification: Cannot exist enhanced any further.

Y'all go to keep the weapon, only you volition lose the materials used for the enhancement.
Transform
When you transform a weapon, you lot create a new weapon and the name of the weapon changes. When you transform the weapon more often, it is fifty-fifty possible that the rarity is increased then that the color changes.

You volition lose both your weapon and the materials used and you lot become a new weapon in exchange.
Fuse sacrament
When you lot fuse a sacrament with a weapon, you lot add a sacrament stone to one of the slots of the weapon. This will add the stats of the sacrament stone to the weapon.
Note: Yous become the sacrament stones as a quest outcome of completing a dungeon.
First choose your weapon, and then cull the sacrament stone, after that choose which weapon slot you want to add the sacrament stone in and ostend your choice to fuse the sacrement.

Blacksmith skill levels
Blacksmiths tin exist constitute in various areas. Some are skilled at enhancements, while others are skilled at transformations. Most important is their smithing skill level. High-level enhancements and transformations require high skill levels. Blacksmiths raise their smithing skill by doing their job, and so be sure to frequent the blacksmith who has the skills yous're looking for, in society to help them improve.
Master strokes
Smithy skills are now capable of performing magnificent work with a primary stroke. Blacksmithing at present has a 100% success rate. All skills/items that additional success rate now heave the change of a chief stroke. When a master stroke is performed, all parameters increased during blacksmithing are set to max. Get multiple master strokes on the same item to create weapons of extreme ability.
Fusing left paw item
The effects of fusing a sacrament to an item in your left hand has changed. Sacraments fused when dual wielding or when using a shield now accept their furnishings applied normally. When fusing a sacrament to a two-handed weapon, all stats excluding special effects are tripled.
Political party / friends
Making new friends
Whenever you find someone you get along well with, press Y (switch) or □ (playstation) button and select form party to invite them to bring together you. You probably shouldn't invite complete strangers to join your party, though. Strike up a conversation outset. Getting to know people lets you invite them out on a walk, where private chats will increase your affinity with them.
Notation: If you demand to notice a specific character, enter the main menu and get to friend. Search for the characters name and use the R push button to observe out the location of the character.
Inviting allies to your political party
Generally, you tin have up to three friends with y'all when venturing exterior town. You lot tin ask someone to join your party if your affinity with them is 3 or higher. Invite them to your party either past speaking to them straight or by selecting their name on your friends list.
Note: You don't accept to level all the members on your friends list. As you progress in the story, the characters automatically level up. So feel free to choose your party still you like.
Party fellow member equipment
What the game forgets to explain, is that you can give your party members equipment. In the commencement you lot can only give a weapon, but when your friendship grows stronger, yous can also requite other equipment.
Observe your political party fellow member in the Town of Beginnings, press Y (switch) or □ (playstation) button for the menu, select go for a walk, select thanks, press Y/□ push button again, select give nowadays and select the weapon that yous desire to give. Apply the tabs to give shield, head, armor and greaves equipment too.
Improving other characters
Whenever a cursor is displayed on another thespian, you can press X (switch) or ∆ (playstation) push to bring upward the grapheme analysis screen. Here y'all can view data about that character's stats and actress skills. In the center is the affection system, which measures the intensity of the player's emotions. The attitude icon and ratings tell you near their current mood. This affects how they fight, or human activity when in boondocks. This also ties in to how they develop, both in terms of what they discover easy to larn and what they are proactive virtually.
Grapheme's extra skills
You tin can switch between condition and extra skill displays on the character analysis screen. Ex skill copse display what ex skills a character has caused. Skills that are grayed out have not yet been caused. Ex skill level increases when the graphic symbol uses that skill. Increment a character'southward ex skill to increase the skill's elapsing.
Amore system
The attitude ratings, which take a big effect on a histrion's personality, are displayed in the affection organization. These affect how rapidly they develop, their level of agression in combat, and their reactions to individual chats. You lot will simply catch fleeting glimpses of their true nature, but you lot can lock that in to influence their development. Some combinations of attitude ratings unlock special abilities. Your actions have a profound impact on these special characteristics, so they are probable to alter a great deal.
Affection system circumvolve
The big circle in the center of the screen is calles the affection system circle. It tin can incorporate a max of 6 icons. The development of an emotion is displayed beneath its icon. Compliments during battle strengthen emotions.
The emotion icons special effects are listed next to effect. Select an emotion to open the help window and come across what blazon of upshot it has.
Emotion strength
The forcefulness of each character's emotions is displayed above the affection arrangement circumvolve. Increasing their strength will increase their efficacy in battle.
You lot can encourage sure emotions. When yous encourage an emotion, a special icon volition appear beside it, indicating that it will not weaken. Emotions you don't encourage will weaken every twenty-four hours until they completely disappear. Encourage emotions you lot want to foster.
Emotions strengthen until they chance spilling out of the amore organization circle. If a character is unable to increase any further, "max" will appear near the emotion icon. If you want to strengthen a certain emotion, you will have to weaken others. When all these icons are pressed close confronting each other, in that location'southward no more room for further emotional growth.
Screen changes
Strength of individual emotions are denoted within the affection system circle. This indicates a character's personality every bit a whole, and fluctuates depending on the emotions that the grapheme feels. A grapheme's reaction time volition speed up as their emotions abound and develop. Faster reactions mean that they volition recollect and act quicker in combat. You can switch betwixt condition and ex skill windows. Ex skill level increases when the grapheme uses that skill. Increase a character'due south ex skill to increase the skill's duration. If there's a skill that the graphic symbol has caused that you don't want to employ, you can configure that every bit well.
You are at present able to assign stars to certain skills if a graphic symbol'due south emotion forcefulness is high enough. The more than stars they take, the more often they will use their ex skill. You tin can now modify the ex skill set for a character from the status window. Changing an ex skill will reset the level of the ex skill currently equipped.
Private chats
These icons ![]() (located higher up your friend'south head) signal places where you can skip the small talk and take a more intimate chat with your friend. Here, your friend can relax and really tell you what's on their mind. You can too react positively or negatively. If y'all react in a way that matches your friend'south feelings, you'll brand them happy and deepen your friendship.
(located higher up your friend'south head) signal places where you can skip the small talk and take a more intimate chat with your friend. Here, your friend can relax and really tell you what's on their mind. You can too react positively or negatively. If y'all react in a way that matches your friend'south feelings, you'll brand them happy and deepen your friendship.
Private conversation locations
Teleport Gate Plaza: teleportation gate, black palace respawn indicate and message board.
Market place Street: benchs near get out to Teleport Gate Plaza, flower stall near café, terrace seating at the cafe, benchs nigh exit to Lakeside Park, fountain, fruit stall near inn, benchs at riverside and semicircle sidewalk at riverside.
Lakeside Park: benchs at lakeside, terrace seating at cafe, fruit stall near cafe, fruit stalls near go out to Teleport Gate Plaza, fruit stalls near exit to Market Street, bench in garden house, big tree at the center, benches well-nigh large tree and fountain.
Scenic Overlook: bloom stall nearly exit to Market Street, fruit stall about exit to Lakeside Park, terrace seating at cafes, waterfall and bong.
Inn: tables with 4 chairs.
Your inn room: bookcases, table with 4 chairs, table with two chairs and kitchen.
Annotation: Ringing the bong in the Scenic Overlook while you are alone will reveal hints about date conversations.
Changes in feeling
You tin can take several actions during private conversation. Using the left stick to move close to an opponent, by directly facing them, you tin can use an ambitious approach. You'll put your friend in a bad mood if you do something out of line, but if your timing is right, y'all'll run into your friend'south feelings change. You may fifty-fifty be able to make different moves as your friend gets to know yous.
The different feelings are ordered in the following ranking:
Rank 1: normal.
Rank two: entertained and excited.
Rank 3: happy, connected and romantic.
Rank 4: playful, beatific and intimate.
The rank 4 feelings grant appointment buffs.
Princess carry and pillow talk
Once your friend warms up to yous, you'll be able to concord hands or behave them in your arms in public. Taking them to your room at the inn while performing either actions allows you to accept very intimate conversations. Y'all tin engage in pillow talk if you max out their feelings while having a conversation on the bed. Friends who do not know you well volition not consent to pillow talk. You must go to know them start.
Quests
Quest offers
There are several quest offers posted on the bulletin boards around boondocks. You may accept several quests at a time. Quests can be completed while out on other missions, then take on a quest that requires travel to whichever surface area you're visiting. Return to the message lath after completing a quest to collect its reward. Quests accolade money or valuable items.
Note: In that location are two types of quests. One type is to defeat certain enemies, the other type is to gather ingredients. In case of the defeat enemies quests you need to accept the quest, defeat the enemies and complete the quest. In case of the gather ingredients quests yous don't have to accept the quest earlier y'all go gathering. It is possible to consummate the quest directly if you already have the required ingredients.
Note: In case of the gather quests, check if you can miss the items before handing them in. A large number of these items are besides used by a blacksmith to enhance or transform your equipment.
Effect fragments
If you enter an area marked with a colored circle on the map, it will trigger an result fragment. At that place are several types of upshot fragments, each with their own set of objectives. These quests drop materials and treasure chests when completed, and so exist sure to take them on when you see them.
Notation: Y'all can recognize effect fragment enemies by the crossed swords icon in front of their name.
![]()
Episodic quests
If you meet the objectives and consummate an event fragment, it volition trigger the next part of that quest. The enemies that appear in these quests are incredibly powerful and they may grant you a rare item upon completion. They will not be easy, but you should give them a try one time you and your allies are stiff enough.
Events
Upshot icons
Event icons will appear on the map and over graphic symbol's heads whenever an event tin be triggered. Information technology is generally a proficient idea to seek out event icons if you wish to advance the story.
![]() chief story issue
chief story issue
![]() side upshot
side upshot
![]() sacrament invasion issue
sacrament invasion issue
Issue list
If you forget where yous are going of what yous are doing, select event list from the main carte to remind yourself.
Note: If you need to observe a specific character that starts an event, enter the primary menu and select friend. Search for the characters proper noun and use the R button to find out the location of the grapheme.
Boss
Dominate fights
The bosses that control each area are physically massive and incredibly powerful. The all-time strategy is to target specific parts of the boss in an endeavour to inflict knockdown. This is because, in virtually cases, inflicting knockdown will expose weak points or targets that were out of range. Cooperating with your political party members is essential, as destroying ii parts of a boss simultaniously is necessary at times.
Raids
You tin merge your political party with another party or parties during boss fights to create a raid political party. There are two things to be aware of when fighting in a raid party: boss part assignments and dominate assault evasion. This is crucial to ensuring that parts of the dominate go destroyed, knocking it down and opening it up to massive impairment.
Bosses typically wield attacks that deal massive impairment and take a big AoE, then it's important to fight tactically. That means knowing when to tell your allies to evade so they don't become hit.
Edit your raid party
Edit your raid party for the dominate battle. You can choose from iv options:
- Total raid: y'all and 3 other parties.
- 3 person party: you lot and 2 other parties.
- 2 person party: you lot and ane other party.
- Solo: y'all fight alone.
Terminal set on bonus
If you land the last set on, you get the final attack bonus.
Note: Don't worry if you don't get the bonus at your first try. You can fight the boss once more, merely go back to the boss room.
Multiplayer
Multiplayer style
You can play SAO: 60 minutes with people from all around the world. Up to 4 players can bring together a single party. Each tin bring along a partner for a total party size of viii. You must first unlock multiplayer by playing the game. The multiplayer pick unlocks after y'all defeat the starting time region dominate (at Rustoria Plains). Then, select multiplayer form the title screen. Head to the multiplayer lobby.
Matrimony fashion
Up to 4 players and their partners (total of 8 players) may adventure together in marriage mode. Select "form a party" to become the party leader (host) and search for allies to play with. You tin also join an existing party by selecting "find a party" or "quick match". Choosing solo volition allow y'all and your partner to play upwardly to half-dozen other characters in union mode.
When your party is ready, y'all tin can embark on an adventure in Ainground. To do this, the host must speak to the receptionist at the multiplayer counter and select a destination. Step through the leave on the correct once the host player has selected a location to begin your adventure. Utilize the lounge exit on the Marketplace Street to exit union fashion or leave the lobby you are currently in.
Sacrament invasion / dungeons
Game manner
In this game mode, you must defend areas from attack while fulfilling objectives. It is of import to discover a adept balance between criminal offence and defense. You lot can run this mode as both single and multiplayer.
Note: Sacrament invasion becomes available after y'all defeat the monster (nighttime immortal) at the Oldrobe Woods.
Sacrament invasion is intended for high-level players. Characters level l or above are recommended. Sacrament invasion is recommended for large groups of players. Form a political party of iv or more to proceed. To progress further, you must offset beat Fuldum Trail in the main game. After entering the Fuldum Trail, you lot may access this content again from the map teleporter.
Fuldum Trail
The Fuldum Trail starts when you go to the dungeon in the Fuldum Trail surface area. This is a tutorial dungeon and the recommended level is level 50. The map below indicates where you lot need to be (player cursor location).

The mission is to break the seal and defeat the boss, while defending three fundamental points (red, blue and green).

After you consummate the trail, head back to the inn. You will get a background story nigh these dungeons.
Subsequently completion of the trail
Now you can practise other dungeons. You can recognize a dungeon on the map by the dungeon icons.
![]()
Change appearance
Modify avater
You lot can become to your room at the inn to edit your avatar. Select activeness at your desk and select edit avatar.
Change battle equipment
The pseudo-tailor lets you change your advent without changing your battle equipment. The pseudo-tailor can only alter the caput, body and leg equipment appearance.
Note: The pseudo-tailer is located in front of the armor store that belongs to Speedy.
Visualize attire
Caput to the tailor in town to edit your armor'due south appearance without irresolute its base stats. Exercise your favorite armor and adventure in manner! To deactivate, go to the main menu, select equipment and select turn visualize off.
Visualize attire (ally)
Y'all can visualize the attire of your allies to change their armor'due south appearance. First partner with the ally in town, so head to the tailor to change their appearance. To deactivate, press the Y (switch) or □ (playstation) to talk to your partner, and cull "restore visuals".
Changes to game mechanics
The Warriors of the Sky update includes a number of changes to game mechanics.
Changed action elements
Sword skills have been adjusted. Attributes have been added to sword skills, while adjustments take been made to activation, recovery and attack range. Steps have been adjusted. Forward steps are now faster. Sidestep invulnerability time has been increased, but distance traveled has been decreased.
Guarding
Information technology is now possible to guard with every weapon. Press the 50 button to guard. Guarding allows you to drastically reduce the damage dealt to you lot by enemy attacks. Still, SP will exist consumed in its identify. Guarding with a shield instead of a weapon greatly increases the damage reduction. If guarding would crusade yous to lose more than SP than yous have, guarding will neglect and you volition take harm.
SP charging
Concord the step push (R push button) while guarding (L button) to charge and recover SP.
Guard break
Some sword skills are now able to break the opponent's guard and deal damage to them. See skill descriptions to see if they possess guard breaking effects.
Raging pulse
When in danger, players can execute a counterattack to knock back enemies. This can be used while knocked down, stunned or recovering from a guarded attack, letting you quickly counterattack.
Menu changes
The main carte du jour has been updated. Set up palette (duel) has been added to the main card. Apply the 10 button to brandish the upshot list. Log has also inverse to log/chat. The position of the keyboard chat window has as well been adjusted.
Changes in update iii
Sacremant invasion update 3 contains several fixes and adjustments.
Changes to battle
Sword skills, mastery upshot and the upper levels of the philharmonic road take all been tweaked. It is now easier to modify certain sword skill attacks using the left stick on your controller. Felling enemies in quick succession boosts your chain count, which grants a chain bonus. There is now a small chance that an ultana gold piece will drop with each concatenation bonus earned.
Changes to dungeons
Some rare items now have a higher risk of dropping in all sacrament invasion dungeons. The rewards for dungeons from updates 1 and 2 have been tweaked. Yous can now acquire more powerful equipment. The update number in which each dungeon was introduced is now written above its icon on the map screen.
Changes to multiplayer
Union mode and duel mode have been adjusted. Higher difficulties now increase the drop charge per unit in union style. In improver, parties with more members will also savour higher drop rates. Partners and characters that play with you in multiplayer'southward solo mode practise not increment your drop rate. Landing a sword skill attack following a guard break or after successfully blocking a sword skill will stagger your opponent. This will cause "weak" to announced. Attacks on weakened enemies bargain additional impairment.
Lord of the inferno
The lord of the inferno, rumoring among players to be an invincible boss, has descended upon the country! Yous may challenge the lord of the inferno one time y'all accept completed warrios of the sky. Complete the chief story and so select continue form the title screen to play warriors of the heaven.
Other
Multiplayer and palette set presets can at present be set from the teleporter in the Plaza or your room. You can now access duel way class the Town of Beginnings. Select duel practise form the teleporter.
Source: https://gamefaqs.gamespot.com/switch/248740-sword-art-online-hollow-realization-deluxe-edition/faqs/78238/tutorials
0 Response to "Sword Art Online Hollow Realization Deluxe Edition Pc Switch to Controller"
Post a Comment